The first thing we had to do, and anyone looking for inspiration, was find some fabric. It only took one trip.........
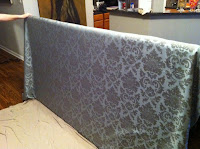
Fabric on the left would become the curtains and our headboard fabric was the pretty print on the right. It makes the room very relaxing and calming when you see it.
Getting measurements for this headboard are crucial! If we had misscalculated on material it would have made for an awful night. I wanted to use plywood but upon inspection we noticed that every piece was warped. We went through at least 6 different sheets before we decided on a different material. Plywood is very hard to work with and I didn't like the idea of MDF since it is very heavy but because there were no imperfections I felt it would work perfectly. For those of you that don't know us, you have to picture 2 people in a maze with no directions. We were wondering around Home Depot looking for tools and gadgets, asking questions and trying to describe things with no correct vocabulary. We even had workers trying to help us find things we were describing what we thought it should be called. It was pretty comical when a designer is telling an 18 year that I need a support bracket for the back of the MDF and him showing up with at least 8 feet of metal tubing. Not at all what I needed. Literally, after a few hours, we were out the door with everything.
When we returned to my studio, AKA my living room, everything had to be cleared out to make room for the massive project. I laid a sheet down to protect the fabric from getting any dog hair. My assistant, Jackson, is a Golden Retriever that weighs 90 pounds and loves to lend a paw when needed.
The process is pretty easy after you have everything you need. It's like making a ham and mustard sandwich, layer after layer after layer. We started with the MDF first. Sprayed lots of adhesive on it at close range. This is very important, the more you have the better your batting will adhere. I used 1.5'' to make the headboard thick and fluffy, you don't want to lay in bed and hit your head on the MDF. Not very romantic, huh? After we let that sit and dry we picked up the MDF and then laid the fabric printed side down. Maneuvering the headboard on top is the tricky part, especially if there is a complicated design on the front. once your MDF is in position, I started stapling the headboard from the middle out towards the corners.

As you can see from here it looks pretty easy, stapling as you go. I put in two rows of staples to make sure each side was secure. Be careful on your corners, make sure you round each of them off to make for a chic look. The more square look the modern feel you will get. Trim any excess you may have. This helps when you are hanging and need all the eye room possible. I use two mounting kits and screwed as many of the screws into studs as possible. The other screws must have anchors!! Very important to find studs. (you already found me) :)
After many trips to Hobby Lobby and Home Depot, meeting new friends along the way, we have an incredible center piece.


3 comments:
This is absolutely beautiful Greg. I cannot wait until you come to Dallas to design my living and dining room! You are so talented.
I love the grand finale! It looks amazing!
OMG I am in lust with this headboard!!! AWESOME!!!
Post a Comment